Deleting Data
This screen allows you to start, to monitor and to control a deletion process.
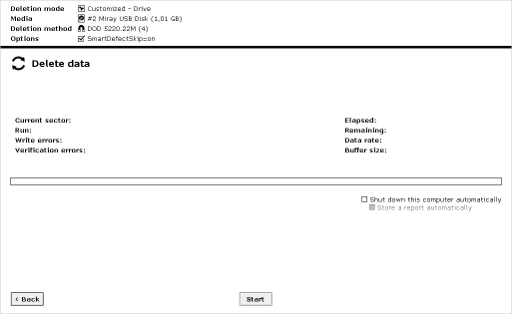
The Delete data dialog (fig. 1) dialog will upon initiation of the data transfer. Some program functions will show a Security Query before starting. In this case, check the Status Panel for correct settings. If needed, return with Back and adjust the settings. Select Start to start the deletion process.
 |
|
| fig. 1: 'Delete data' dialog |
Indicators are located to both sides of the control panel, which show the status of the deletion process.
| Status | Description |
|---|
| Sectors processed | Absolute number of sectors that have already been deleted. |
| Run | Number of deletion runs initiated up to this point. |
| Write errors | Amount of write errors encountered. Number may decrease if errors can be fixed. |
| Verification errors | This indicator is only used when Verify is selected. |
| Runtime | Time elapsed since the start of the deletion process. |
| Time remaining | Estimated time remaining for the entire deletion process. |
| Data rate | Average data rate attained up to this point. |
| Buffer size | Size of the internally used buffer. |
The percentage display (fig. 1), located below the deletion animation, shows the progress of the current run in percent.
The progress bar (fig. 1) below the percentage indicator shows the progress of the current run. Above the progress bar to the left, the active run type is shown.
The entire process consists of several runs that are determined by the selection of the Deletion Methods. First, a regular deletion run is executed along with an optional Verification Run. Each deletion run can be followed by a complementary run with an inverted deletion pattern, as well as an optional Verification Run. This sequence can be repeated up to 99 times. Depending on the deletion method chosen, a final run with random numbers and an optional Verification Run can be performed. Program functions of the custom group therefore allow up to 398 runs. Additionally, a number of troubleshooting runs can be perfomed with the SmartDefectSkip option.
| Note: In this instruction, the term 'deletion process' is used to describe the complete process with all of its corresponding runs (deletion, verification, troubleshooting). |
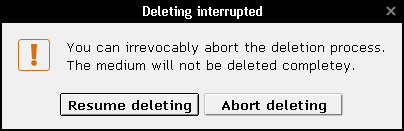
Stop interrupts the process (fig. 2). You may then either continue the process or ultimately cancel it. You will then obtain a Deletion report.
 |
|
| fig. 2: Cancel deletion |
| Note: By activating the SmartDefectSkip option, it is ensured that, even when the deletion process is prematurely aborted, the highest achievable security level possible is reached up to that point. |
| Example: If a seven-run deletion process is aborted after its third run, the security level of a three-run deletion process will apply. |
Once all runs are finished, the deletion process is terminated normally. A Final Report for the complete deletion process will be shown in a dialog.

